Try the Best Music Converter Now!
100% Secure. No virus.
100% Secure. No virus.
Share this article:


Nowadays, listening to Apple Music on an iPhone has become a daily habit for many people. You can enjoy music anytime and anywhere due to the convenience of mobile devices. In order to keep your music consistent across all devices and avoid redownloading or repurchasing the same tracks, syncing Apple Music to your iPhone is important. In this article, we will show you 4 solutions to sync Apple Music to iPhone. Let’s dive in!
If you’re a subscriber to Apple Music or iTunes Match, iCloud offers an easy way to sync Apple Music to your iPhone without taking up your storage space. The only thing you need to do is turn on the “Sync Library”. Before doing that, please make sure that all your devices are updated to the latest versions, signed in with the same Apple ID, and connected to the same Wi-Fi network.
Step 1. Run Apple Music and click “Account” to see your profile.
Step 2. Select “File”, locate “Library” > “Organize Library”, and then choose “Consolidate files”.
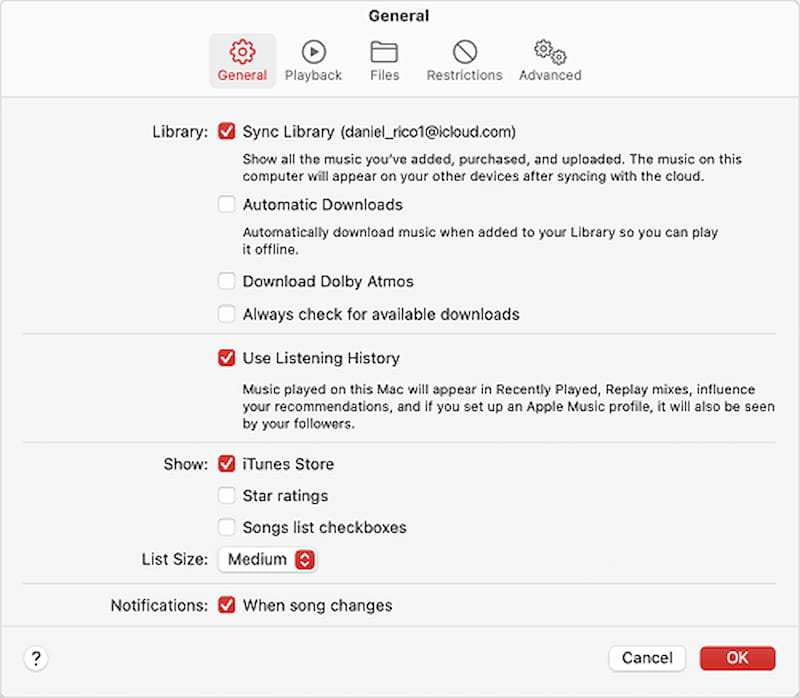
Step 3. Navigate to the “Settings or Music” and choose “Preferences”.
Step 4. Choose the “General” tab, turn “Sync Library” on, and then click “OK” to initiate syncing.
Note
The “Sync Library” is named “iCloud Music Library” for Windows.
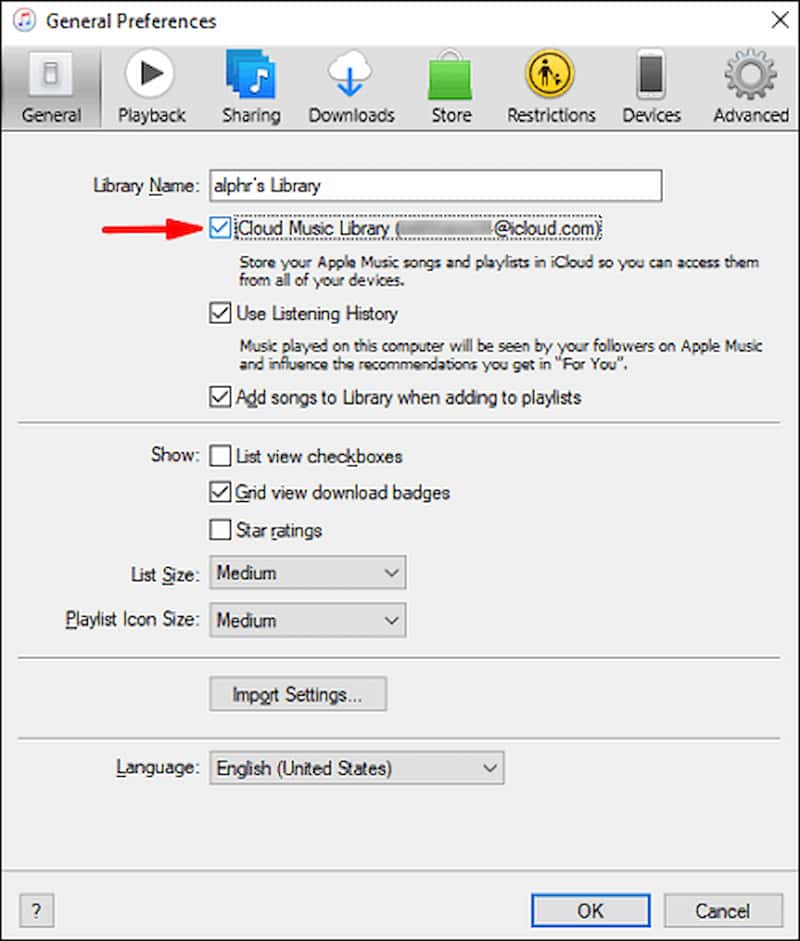
Step 1. Open iTunes on your computer, then press “Edit” > “Preferences” on the menu bar.
Step 2. Navigate to the “General” label and choose “iCloud Music Library” to sync Apple Music to your iPhone.
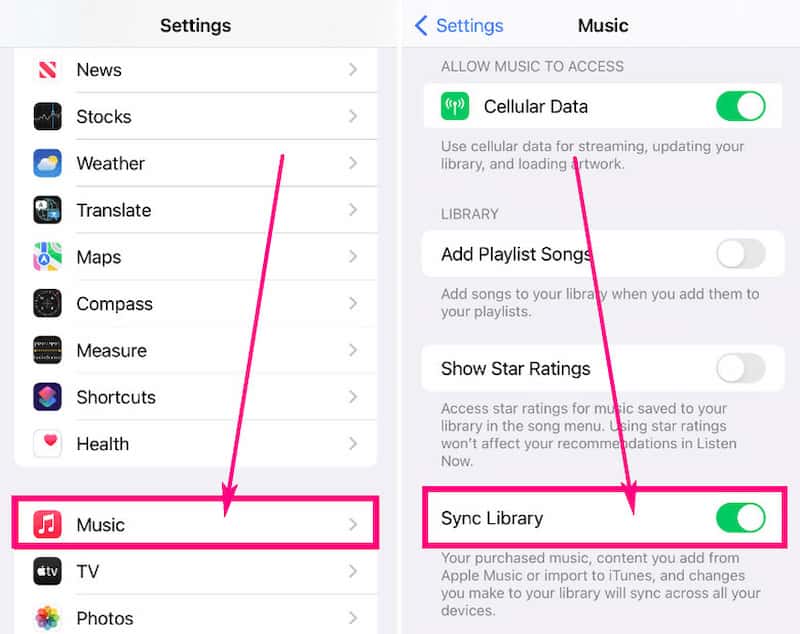
Step 1. Open “Setting” on your iPad, iPod Touch, or another iPhone, and then scroll down to choose “Music”.
Step 2. Turn on the “Sync Library” button, and then you can sync music to your iPhone.
For those who haven’t subscribed to Apple Music or iTunes Match, or who want to sync music selectively, you can manually sync music to your iPhone with iTunes and Finder. The transferred music must be purchased, and you can’t convert Apple Music to MP3 or other open-source formats.
Transfer music to iPhone with a USB cable
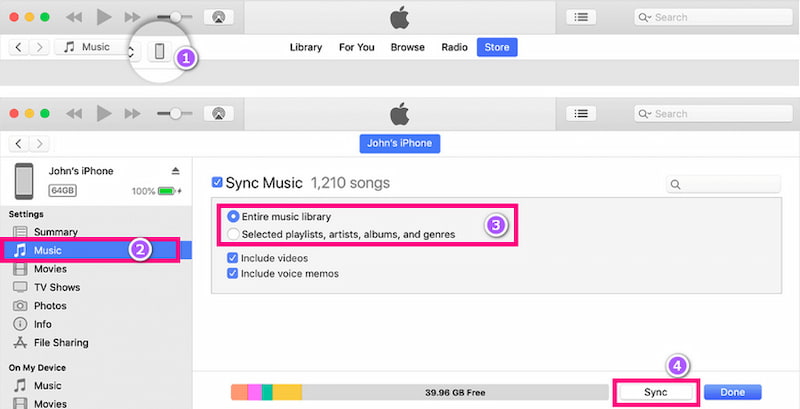
Step 1. Connect the iPhone to the computer by using the USB cable and open iTunes.
Step 2. Click the iPhone icon at the top-left corner, and choose “Music” in the “Setting”.
Step 3. Decide to sync the “Entire music library” or “Selected playlists, artists, albums and genres”, etc.
Step 4. Press “Sync” to transfer music to iPhone.
Sync music to iPhone under a Wi-Fi connection
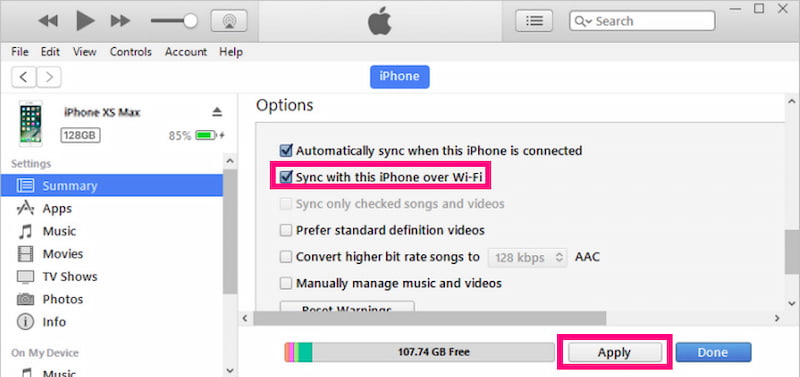
Step 1. Connect your iPhone to your computer through USB.
Step 2. Launch iTunes and locate your iPhone.
Step 3. Click “Summary”, press the “Sync with this device over Wi-Fi” option, and then click “Apply”.
Transfer music to iPhone via a USB cable
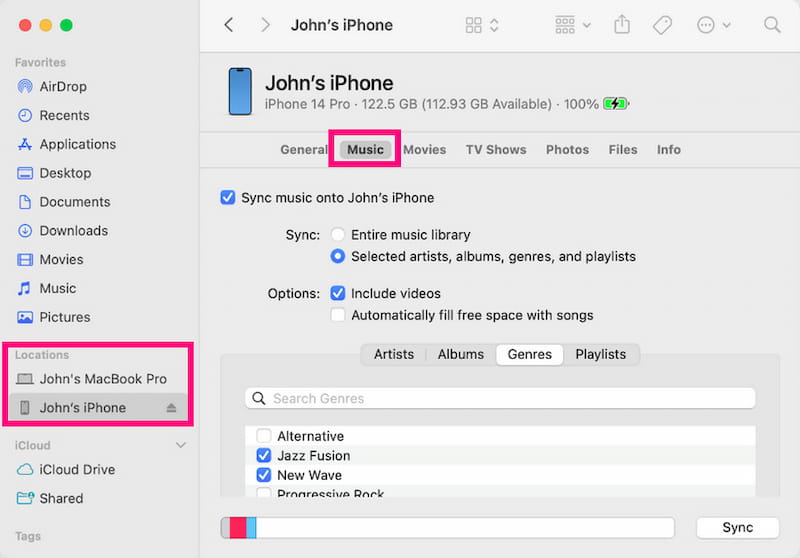
Step 1. Connect your iPhone to the computer via USB and open Finder.
Step 2. Select your iPhone in the “Locations” label and click the “Music” tab.
Step 3. Determine to sync “Entire music library” or “Selected artists, albums, genres, and playlists”, etc.
Sync music to iPhone through Wi-Fi
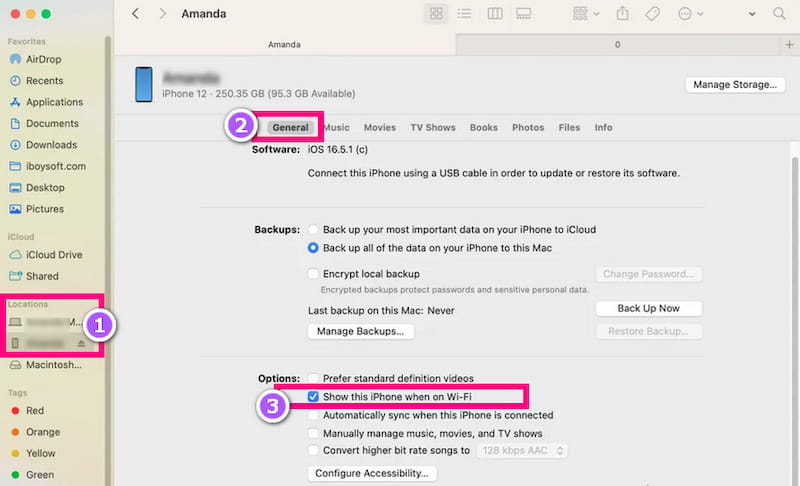
Step 1. Connect your iPhone to the computer by USB cable.
Step 2. Launch Finder and find your device, then click “General” in the navigation bar.
Step 3. In “Options”, click “Show this iPhone when on Wi-Fi”. Then click “Apply” to sync music to your iPhone.
Although the above two approaches could sync Apple Music to your iPhone successfully, they have limitations: tracks are not accessible once the subscription expires, and are limited to Apple Music devices. Regarding these limitations, we greatly recommend StreamByte for Music as your best choice. It’s an all-in-one music converter that can download music without a subscription or purchase.
Key Features:
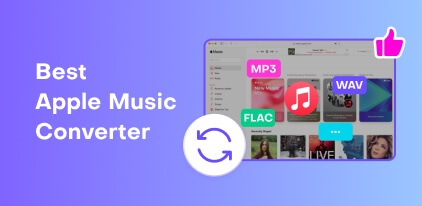
• Support various output formats: MP3, WAV, M4A (AAC), M4A (ALAC), FLAC, and AIFF.
• Download music without loss: with a bitrate up to 320 kbps and a simple rate up to 48 kHz.
• Use the built-in Apple Music web player to provide an original website browser experience.
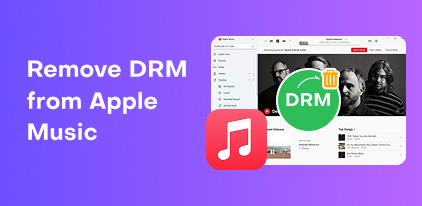
• Remove DRM safely and efficiently (only for personal use).
• Boost an amazing 35× faster conversion speed.
• Batch convert music to save time and energy.
• Keep ID3 tags preserved to easily manage tracks.
100% Secure. No virus.
100% Secure. No virus.
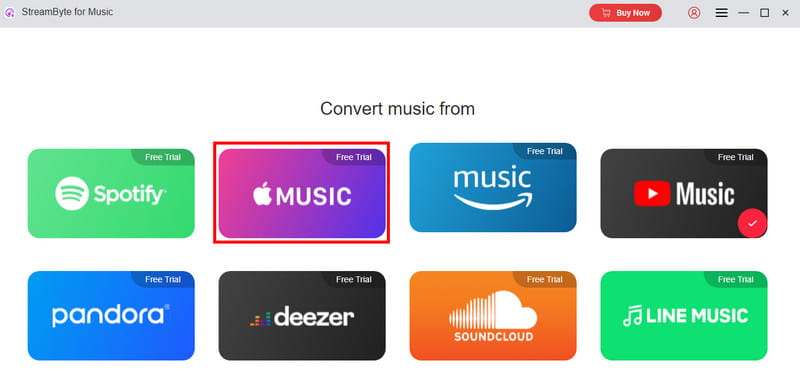
Follow the steps below to transfer music to an iPhone or any device through StreamByte for Music:
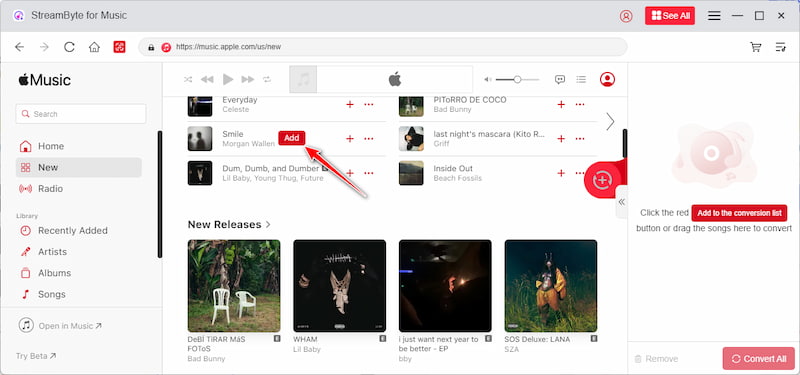
Step 1. Open StreamByte for Music and choose Apple Music on the main interface.
Step 2. Add songs by clicking “Add to conversion list” or by dragging and dropping tracks directly into the list.
Step 3. Click “Convert All” to download the music and wait for the conversion.
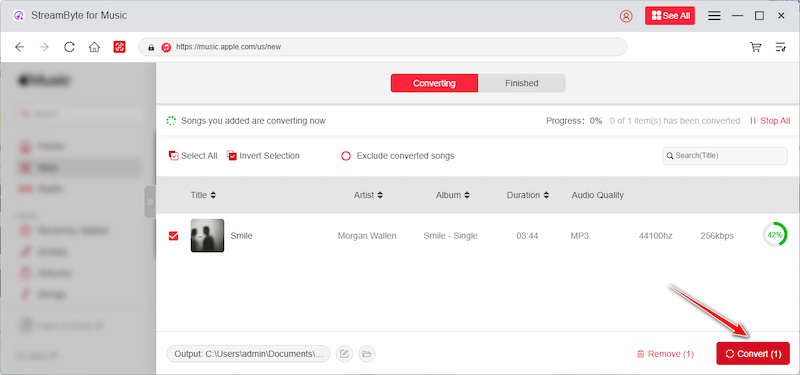
After downloading, you can find your desired music in the “Finished” tab. Now you are able to transfer music to your iPhone by USB cable or iTunes. Enjoy music now!
The chart below will give you a view of the 3 methods:
| Sync via iCloud Music Library | Sync with iTunes and Finder | Sync by StreamByte for Music | |
| Available Output Formats | AAC | AAC | MP3, WAV, M4A (AAC), M4A (ALAC), FLAC, and AIFF |
| Bitrate | 256 kbps | 256 kbps | 128 kbps, 256 kbps, 320 kbps |
| Available Apple Music | All songs (while subscribed) | Purchased songs | All songs |
| Device Limitation | Authorized devices | Authorized devices | No device limit |
1. Why is my music not syncing to my iPhone?
Please ensure that:
• The network works well.
• Subscription is active.
• You have registered the same Apple ID.
You can also confirm the songs’ cloud status on a computer. If the problem still can’t be solved, you can try StreamByte for Music to sync Apple Music to your iPhone after downloading.
2. How to get back the Apple Music library on iPhone?
Step 1 . Open “Setting” > “Music” on iPhone.
Step 2 . Find the “iCloud Music Library” option.
Step 3 . If it’s enabled, turn it off, then turn it on to refresh the music library.
3. Why can’t I transfer music to the iPhone Apple Music?
If your playlist contains tracks imported from CDs or other sources, Apple Music can’t recognize them, so the playlist can’t be shared.
Well, I have shown you 3 methods to sync Apple Music to iPhone in today’s article. Among them, StreamByte for Music performs better in many aspects, including various output formats, unlimited devices, bitrate, etc. We recommend that you try it and enjoy free music from now on!
All Music Converter
Best music converter to download music from multiple streaming media without losing quality.
Patrick Smith is a passionate and knowledgeable music enthusiast who doubles as an engaging content sharer. He has either explored or directly used most of the mainstream music platforms available in the market. This hands-on experience equips him with in-depth insights into the features, user experiences, and nuances of these platforms.
His enthusiasm for sharing his findings and experiences drives him to create valuable content, whether it's in-depth reviews, comparison articles, or tips and tricks for getting the most out of music platforms. Through his sharing, he hopes to guide fellow music lovers in making informed choices and enhancing their music-listening experiences.
Expert who supports offline music from streaming media.
SubscribeCopyright © 2026 StreamByte. All rights reserved.

Subscribe to get StreamByte upgrades, guides, discounts and more in the first moment.
Invalid Email Address.